Photorealism Grid Calculator
The grid system is essential for photorealistic work, as described in the article. Divide your reference photo into equal squares, then transfer those sections to your paper for accurate proportions.
Photorealism isn’t just about copying a photo. It’s about rebuilding reality with pencil, charcoal, or paint-line by line, tone by tone-until the image feels more real than the photo itself. Many beginners think it’s about having steady hands or being naturally talented. The truth? It’s about patience, observation, and breaking down complexity into simple steps. If you’ve ever stared at a photo and wondered how someone made it look like a living scene, you’re not alone. And you don’t need years of training to start getting results.
What Photorealism Really Means
Photorealism emerged in the late 1960s and early 1970s as a reaction against abstract expressionism. Artists like Chuck Close and Richard Estes used photographs as references to create paintings so detailed they fooled viewers into thinking they were looking at a high-resolution print. But here’s the key: they weren’t tracing. They were translating. Every shadow, reflection, and texture had to be calculated, measured, and reconstructed.
Today, photorealism includes both traditional media-oil, acrylic, graphite-and digital tools like Photoshop and Procreate. But the core principle remains the same: eliminate guesswork. If you see a blur in the photo, you don’t guess what it is. You analyze it. Is it motion? Depth of field? Light spill? Then you replicate it with precision.
What sets photorealism apart from hyperrealism? Hyperrealism often adds emotional or narrative elements not present in the original photo-enhanced reflections, exaggerated textures, surreal lighting. Photorealism stays faithful. It’s a mirror. Not an interpretation.
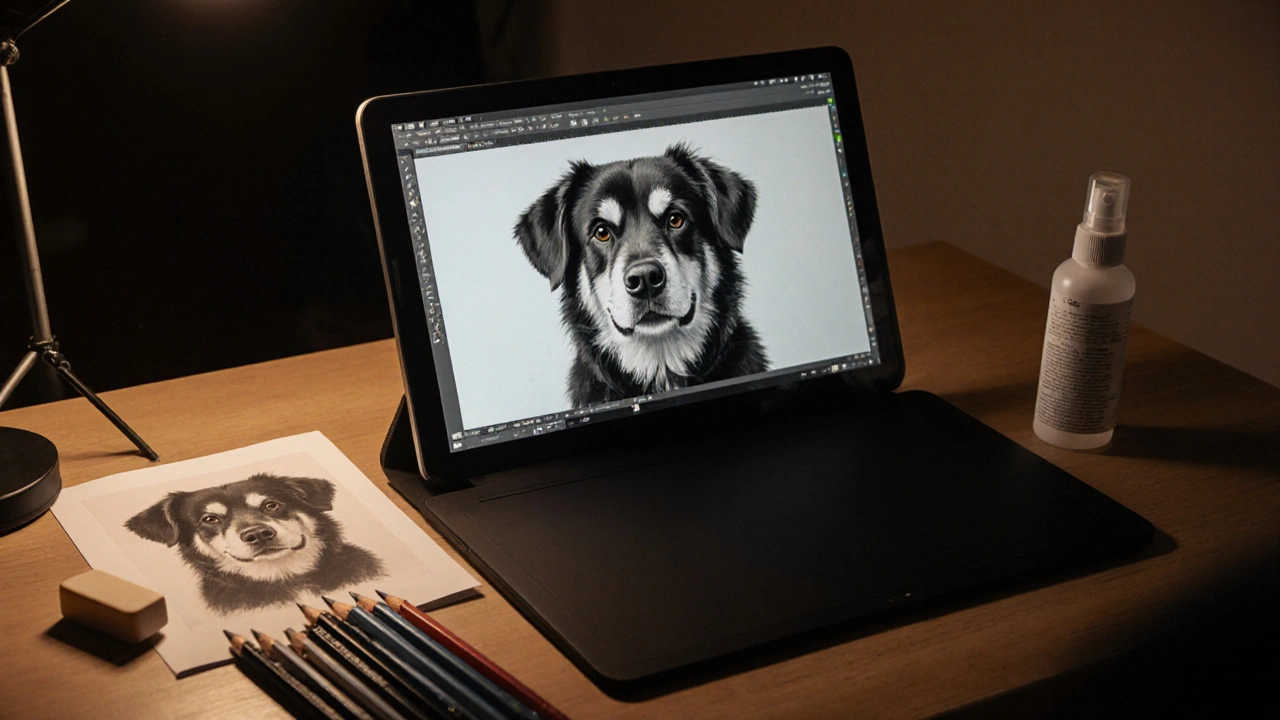
Essential Tools for Photorealistic Work
You don’t need expensive gear to start, but you do need the right tools for control and accuracy.
- Graphite pencils: A range from 6H (light) to 8B (dark) gives you full tonal control. Most artists rely on HB, 2B, 4B, and 6B.
- Blending tools: Tortillons, chamois cloths, or even a soft brush help smooth transitions without smudging.
- High-resolution reference photos: Use a camera with at least 12 megapixels. Avoid JPEG compression artifacts. Shoot in RAW if possible.
- Grid system: A simple grid drawn over your photo and your paper helps transfer proportions accurately.
- Eraser: A kneaded eraser lifts graphite gently; a precision eraser sharpens edges without tearing paper.
- Matte fixative: Prevents smudging once you’re done. Spray in a well-ventilated area.
Digital artists use tablets like the Wacom Intuos or iPad Pro with Apple Pencil, but the workflow is nearly identical. Layers become your grid. Zoom in to 300% to check pixel-level detail. The same rules apply: observe, measure, replicate.
Step-by-Step Process: From Photo to Photorealism
Here’s how to turn a photo into a photorealistic drawing in six clear steps.
- Select the right photo: Choose one with strong contrast, clear lighting, and minimal clutter. A portrait with side lighting or a car reflecting sky and pavement works better than a flat, overcast scene.
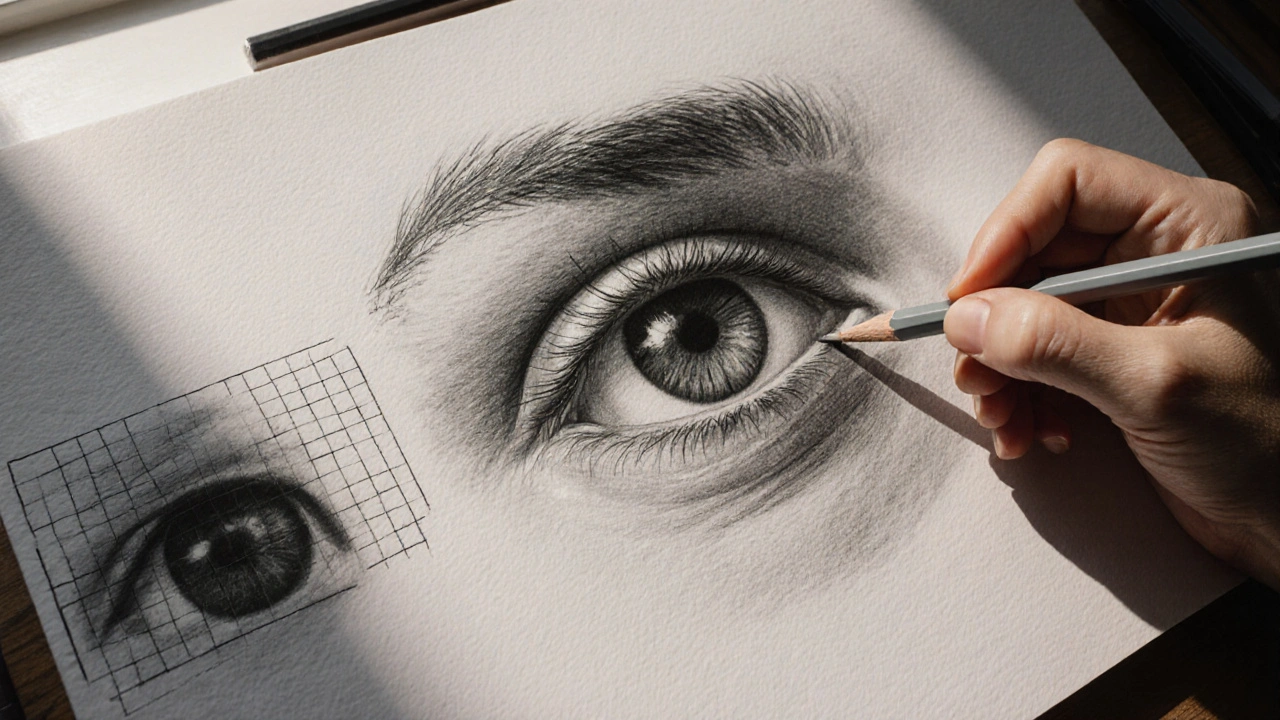
- Apply a grid: Divide your photo into 16 equal squares. Do the same on your paper. This forces you to focus on one small section at a time, reducing overwhelm.
- Outline shapes, not objects: Don’t think “eye,” think “oval with a curved shadow on the right.” Don’t think “hair,” think “a cluster of thin, overlapping lines with varying darkness.”
- Block in tones: Use your lightest pencil (6H or HB) to map the darkest areas. Start with the deepest shadows-eyes, under the chin, inside folds. Leave the lightest areas untouched.
- Build layers gradually: Apply 5-10 thin layers instead of one heavy stroke. Each layer adds depth. Let the paper show through in highlights. Never rush the midtones.
- Refine edges and details: Use a sharp pencil tip and a precision eraser to define crisp edges. Soften edges where light fades into shadow. Add micro-details: a single hair strand, a tiny reflection on a lens, the texture of fabric weave.
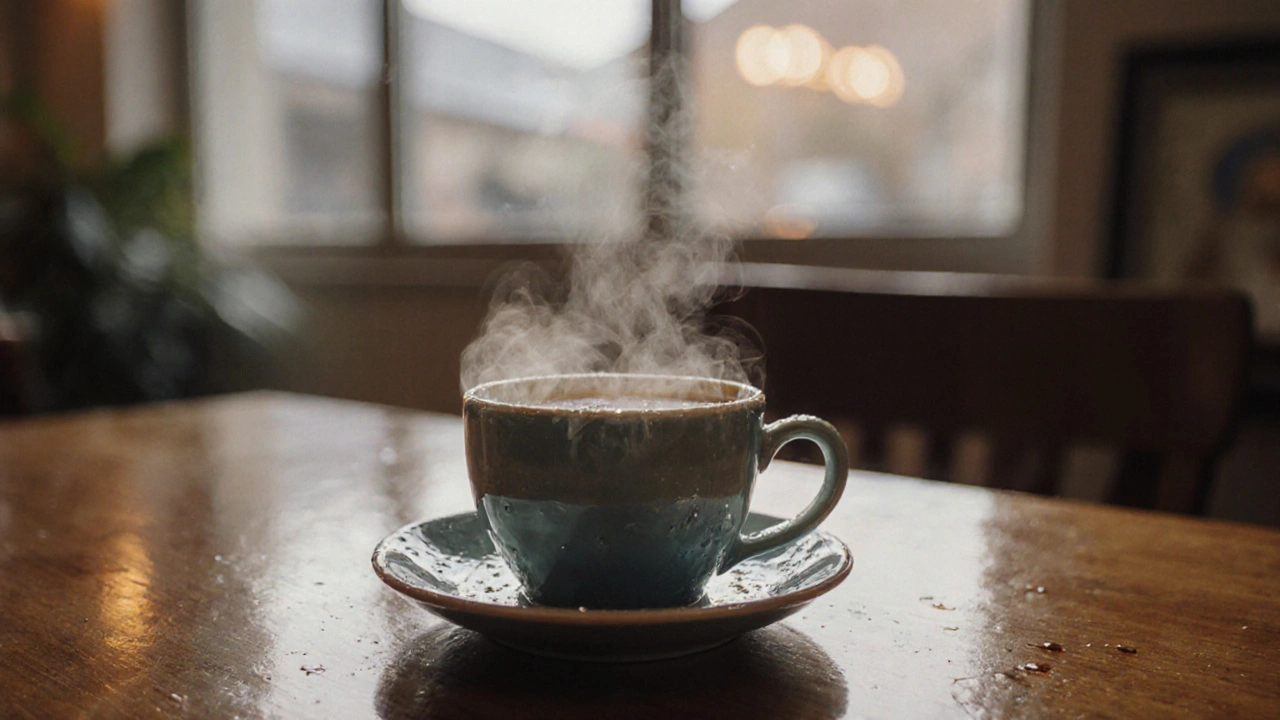
One artist in Melbourne, who paints photorealistic coffee cups, spends 40 hours on a single piece. She says the last 10%-the tiny water droplets, the slight blur on the steam-takes half the time. That’s normal. It’s not about speed. It’s about accuracy.
Common Mistakes and How to Fix Them
Even experienced artists slip up. Here are the top five errors-and how to avoid them.
- Overworking the highlights: Many try to make highlights pure white. But real light doesn’t look like that. Use the paper’s white as your highlight. Only add the faintest touch of white pencil if needed.
- Ignoring color temperature: Shadows aren’t just gray. In sunlight, they lean blue. Under tungsten light, they turn warm. Use a muted purple or ochre in shadows, not black.
- Blending too early: Blending before you’ve laid down enough layers creates muddy tones. Wait until you have at least three layers before blending.
- Copying the photo blindly: Photos flatten depth. Your eye sees three dimensions. Adjust perspective slightly to match how the brain perceives reality-not how the camera captures it.
- Skipping reference photos: Don’t work from memory. Even if you’ve drawn a hand a hundred times, every hand in every photo is different. Study the actual reference.
Practice Exercises to Build Realism
You can’t master photorealism without daily drills. Here are three focused exercises.
- One-hour grayscale study: Pick a photo with strong light and shadow. Draw only in black, white, and one midtone gray. No outlines. Just tones. This trains your eye to see value, not shape.
- Texture challenge: Choose five everyday objects-a metal spoon, a wool sweater, a wet leaf, a glass bottle, a brick wall. Spend 20 minutes on each, focusing only on how light interacts with the surface. No background. Just texture.
- Blind contour portrait: Look only at the photo, not your paper. Draw the outline of a face with one continuous line. Don’t lift your pencil. It’s messy. That’s the point. It forces you to observe proportions without preconceptions.
Do one exercise every morning for 30 days. You’ll notice a shift. Your hand will start to trust what your eye sees.
How Long Does It Take to Get Good?
There’s no magic number. But most artists see noticeable improvement after 50-70 hours of focused practice. That’s not 50 hours spread over a year-it’s 50 hours in 3-4 months, working 3-4 hours a week.
One student from Sydney, who started with no art background, completed her first photorealistic portrait of her dog in 68 hours over four months. She posted it online. Within a week, three people asked to commission similar work. She didn’t win a prize. She didn’t go to art school. She just showed up, day after day, and copied what she saw.
Progress isn’t linear. You’ll hit plateaus. You’ll hate your work. That’s normal. The key is consistency. One hour a day, seven days a week, beats five hours on Saturday and nothing else.
Where to Find Reference Photos
Don’t use random Google images. They’re often low-res, poorly lit, or copyrighted.
- Unsplash: Free, high-resolution photos with no attribution required. Search “photorealism reference” or “studio lighting portrait.”
- Pexels: Similar to Unsplash. Filter by “high contrast” or “dramatic lighting.”
- Photography forums: Reddit’s r/photorealism has a weekly reference thread. Artists upload their own photos for others to use.
- Your own camera: Set up a still life. A cup, a key, a piece of fruit. Shoot it with natural light from a window. Use it as your reference. It’s yours. No copyright issues.
Always check the license. Even free sites sometimes require attribution. When in doubt, use your own photos.
Final Thought: It’s Not About Perfection
Photorealism isn’t about making something flawless. It’s about making something believable. If a viewer looks at your drawing and says, “I could reach out and touch it,” you’ve succeeded. Even if there’s a tiny flaw-a slightly off shadow, a hair out of place-it doesn’t matter. The brain fills in the gaps.
The most powerful photorealist pieces aren’t the ones with the most detail. They’re the ones that make you pause. That make you wonder, “Did they paint this? Or did I just walk into a photo?”
Start small. Start today. Pick one photo. One object. One hour. Let your hand learn what your eye already knows.
Can I use a photo I found online for photorealistic art?
You can use it for practice, but not for selling or sharing publicly unless you have permission. Most online photos are copyrighted. Use free sources like Unsplash or Pexels, or take your own photos. When in doubt, assume it’s protected.
Do I need to be good at drawing to do photorealism?
You don’t need to be good at imaginative drawing, but you do need to learn accurate observation. Photorealism is less about creativity and more about measurement and replication. If you can copy shapes, values, and edges precisely, you can do photorealism-even if you’ve never drawn a person before.
Is photorealism considered real art?
Yes. It’s a recognized movement with major galleries and collectors. Artists like Chuck Close and Audrey Flack are in the MoMA and the Tate. Photorealism requires immense technical skill, patience, and discipline. It’s not copying-it’s translating vision into another medium with extreme precision.
What’s the difference between photorealism and hyperrealism?
Photorealism aims to replicate a photo exactly-no added emotion, no exaggeration. Hyperrealism takes the photo as a starting point but enhances details, lighting, or texture to create something more intense, often with emotional or social commentary. Think of photorealism as a mirror, hyperrealism as a magnifying glass.
How do I avoid smudging my graphite drawings?
Use a light touch, work from top to bottom to avoid dragging your hand over finished areas, and use a sheet of paper under your hand as a barrier. Once you’re done, spray with a matte fixative. Hold the can 12 inches away and use short, even bursts. Let it dry completely before handling.
Can I learn photorealism digitally?
Absolutely. Digital tools like Photoshop, Procreate, or Clip Studio Paint offer layers, undo, and zoom that make precision easier. The same principles apply: observe, measure, layer. Many artists switch between digital and traditional depending on the project. The medium doesn’t define the skill-it’s the process that matters.